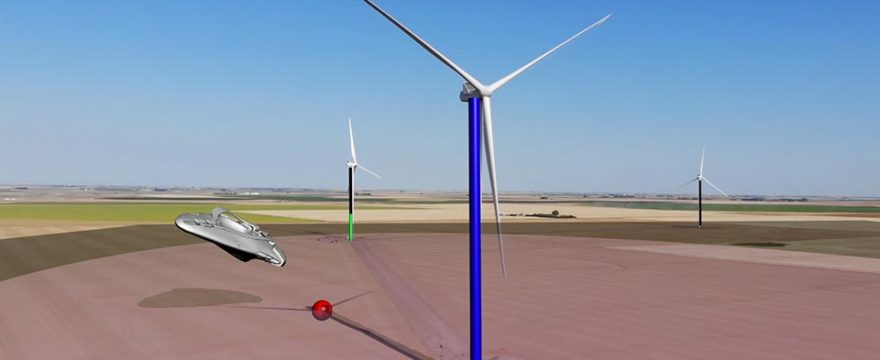
In last week’s tutorial, we imported the Luminaris Starship model into Fusion. Now, it is time to create a simple 3D scene for the model to fly through.
We first get a 3D camera track from the drone footage. From the camera tracker tool, we generate a full 3D scene which includes the animated camera, ground plane, a point cloud, and the render node.
After some adjustments from the ground plane, we place a few shape 3D objects for reference into the scene. This helps in adjusting the light and judging the animation curve.
To get a shadow, we use the spotlight. While a directional light would be more intuitive, the spotlight is the only light that generates shadows in Fusion, so we use it to light the scene.
Finally, we animate the Starship. In theory, it is only a simple animation of one transform 3d node. In practice, you might spend the most time on this task if you want it to look right. Yet, keeping things simple and breaking down the movement into individual parameters will get you there.
Below is Part 2 of the tutorial and this is the overall roadmap for the project:
- Model import
- 3D camera tracking, lighting, and animation (this tutorial)
- Paintwork and planar tracking
- Multi-pass compositing
- Finishing touches
To get the footage and all exercise files and solution files, download the package from part 1 of this tutorial series.


Nice tutorial. Unfortunately doesn’t work in DVR, at least on Mac. Gonna try in Fusion Studio later, but I’m too lazy to go in the basement and fire the Mac Pro.
Merry Xmas to everyone!
It should work. Since this is a bit more processing intensive, I did it in Fusion Studio but all the tools are available in Resolve. Perhaps any problem with the media on Mac? But for me at least I haven’t had a scenario where I couldn’t load something in Resolve that I was able to load in Fusion Studio – only the other way around if at all…