In this final entry of the Fairlight mini-series on VFXstudy, Gavin Lucas dives deep into music editing workflows in DaVinci Resolve Studio. The focus is on efficiently working with music stems, remixing tracks, and aligning edits precisely to the music’s beat using Fairlight’s powerful grid tools. Whether you’re editing narrative content, trailers, or music videos, syncing visuals to music can enhance impact, and Fairlight makes it possible with both manual and AI tools.
Music Remixing with Resolve’s Neural Engine
The tutorial kicks off by showcasing the Music Remixer, a neural engine-powered tool exclusive to Resolve Studio. This tool lets you isolate or adjust different elements of a music track—vocals, drums, bass, etc.—directly in the Edit or Fairlight pages.
Stems and AI Search via Audiio
As an alternative to the Music Remixer, you can directly import stems. audiio.com (sponsor of this tutorial series) allows you to download tracks already separated into stems—perfect for maintaining flexibility and also an option for users of the free version of DaVinci Resolve.
Another interesting feature our partner audiio.com offers is Linkmatch AI, an advanced search feature that allows you to find new music similar to reference tracks. Gavin provides the link to a Spotify song. The AI matches the vibe and instrumentation, which is especially useful when working around copyright limitations.
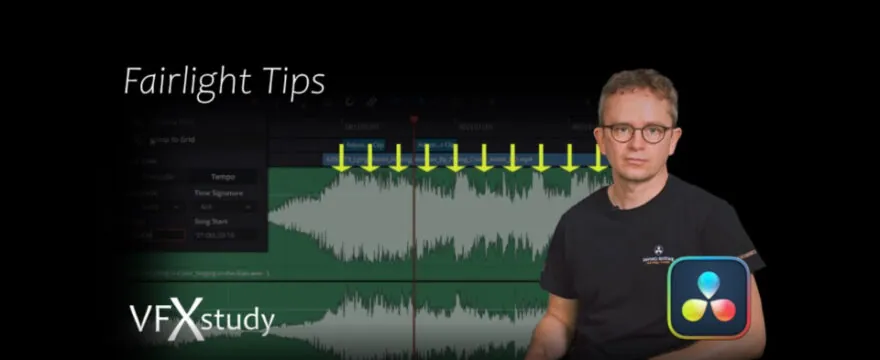
Syncing Edits to the Beat Using Fairlight’s Grid
With the new track imported, the next step is beat synchronization. Gavin outlines several approaches:
- Manual Marking – Simply play the track and tap the “M” key to place markers on each beat. It’s a quick, intuitive way to guide cuts if you’re musically inclined.
- Tempo Grid Setup – For more precision:
- Use an online BPM detection tool to determine the tempo (e.g., 135 BPM).
- Switch to tempo-based grid view in Fairlight.
- Align the beat grid to the music’s actual starting point using a marker and time offset.
Once aligned, you can snap edits and video clips to the beat grid, ensuring perfect sync. Gavin even shows how to duplicate clips on the grid using snapping and copy-paste, great for rhythmic patterns.
Creative Effects with Adjustment Clips
To bring everything together, Gavin demonstrates a visual effect synced to the beat:
- Add an adjustment clip on a video track.
- Apply a visual effect (e.g., light rays).
- Animate a parameter like brightness to pulse with the music.
- Copy and snap this animated adjustment clip to the grid for a rhythmic effect across the timeline.
This technique bridges audio and visual design and can elevate the impact of music-driven sequences in your project.
Final Thoughts
This tutorial comprehensively examines blending audio and visual elements in DaVinci Resolve Fairlight. From remixing tracks with DaVinci Resolve Studio’s Neural Engine tools to precise beat-based editing using tempo grids, it’s packed with techniques that streamline the process and spark creativity.
This was the last Tutorial (for now) in this mini-series on Fairlight with Gavin Lucas. To learn more, have a look at his comprehensive Fairlight training course.

Leave a Comment
You must be logged in to post a comment.