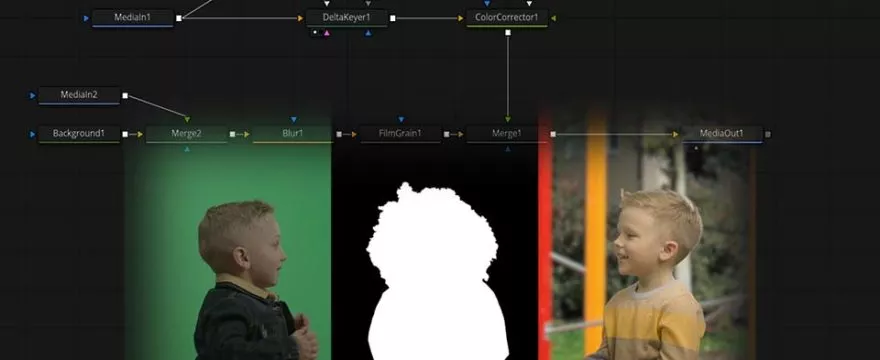
Keying with a one-stop tool like the 3D keyer in DaVinci Resolve can give decent results in average situations. For high-end results in complex situations, you need more than a good tool: You need a solid workflow!
For great keying results you need to make sure you apply the right keying technique for the right problem:
- Uneven Background: Yes, even the best studio lighting will still produce some unevenness on the background. Don’t believe me – start playing with the gamma slider! The delta keyer has an inbuilt background correction algorithm for that. But you have to use it carefully and make sure it only works on the background.
- Edge detail: Soft hiar, semitransparent edges, motion blur etc. In all those scenarios you need to work very carefully. A keyer that retains that detail will very likely have holes in other areas. That’s why we need to deploy different solutions for different areas.
- Holes in the middle: A key that retains edge detail will often leave holes in other areas. We can often fill those either with a mask or with a second harder key. This approach is often called Hard Comp / Soft Comp approach.
- Problems away from the subject: The keyer should be tuned for the subject not for surroundings. Props, shadows, wrinkels and more that are not directly next to the subject can be removed with a garbage mask.
If you consider these points then you are on a good track to a great clean alpha channel. But there are more problems down the line. Your lighting situation in the greenscreen studio is very different from the lighting in the background environment.
For starters, you have to take care of the spill light. The light bounces from the screen and falls onto your actors. Different tools for spill suppression or spill removal have their strength for different scenarios. The built-in mechanism of the Delta Keyer can sometimes lead to discoloration or noise. In those cases, you can use an outside tool for better despill.
But you will inevitably have issues around the edges as well. In the studio, light from the screen was shining directly through the semitransparent edges. In the composite, you would expect something similar from the real-world background. You can start by trying the color correction methods within the despill tool.
Finally, you have to integrate your foreground well with your new background. Among other things, depth of field, noise or grain, color corrections, and shadows play into this.
Your exact workflow will always depend on your exact situation. In this tutorial, we start with some of the most important techniques while keeping the flow simple. It provides a good starting workflow. As you refine your skills and gain experience you can add to this whenever the situation demands it.


Leave a Comment
You must be logged in to post a comment.